Technology
Scheduling Poll (Outlook)
Last modified 12/17/2024
Scheduling Poll is the new replacement feature for the previous FindTime add in, which is built directly into Outlook clients for all users as a native feature. For more detailed information on Scheduling Poll please see the following support articles: Scheduling Poll Add-In.
Accessing Scheduling Poll
To access Scheduling Poll follow the steps below:
- Open Outlook (either Web or Desktop version).
- Create a new email or select an email to reply to. List required attendees for the meeting in the To field and optional attendees in the Cc field. Note: Scheduling Poll does not accept distribution list, recipients must be added individually.
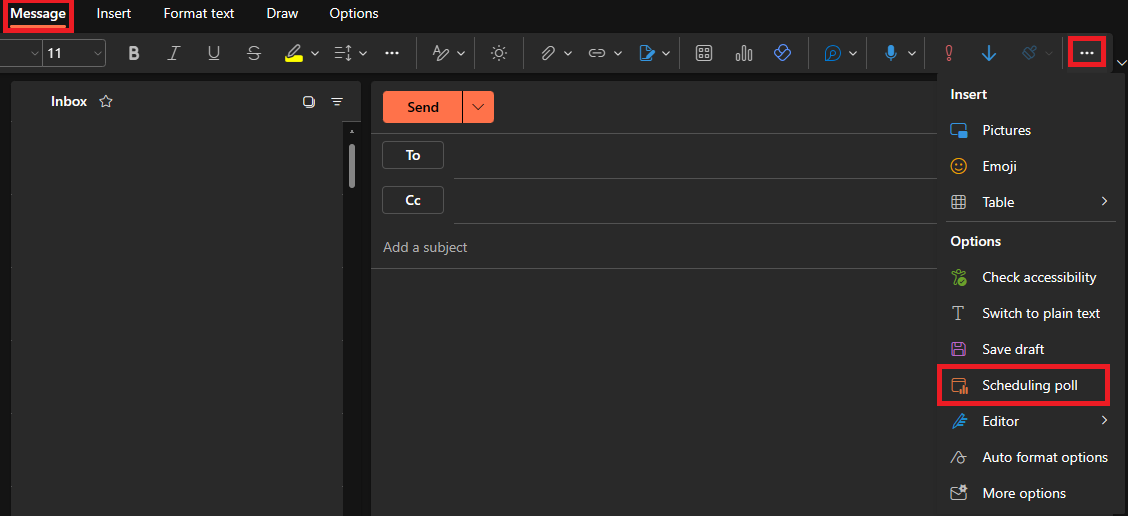
- In the Message tab (Windows) or Tool bar (Mac), select the 3-Dots and choose Scheduling Poll. (Figure 1)
- Figure 1
- The Scheduling Poll options will then pull up. Choose your desired dates and settings and hit Create poll. Scheduling Poll inserts the poll details into your email body which includes a link to the voting page and a link to all the polls you’ve created so far.
Select Send to send the email and start the voting process.
How to Get Help
Technical assistance is available through the Illinois State University Technology Support Center at:
- Phone: (309) 438-4357
- Email: SupportCenter@IllinoisState.edu
- Submit a Request via Web Form: Help.IllinoisState.edu/get-it-help
- Live Chat: Help.IllinoisState.edu/get-it-help
