Technology
Sharing Settings Report for Microsoft OneDrive and SharePoint
Members of Illinois State University may run a report that will tell them what their current sharing settings are for their Microsoft 365 OneDrive and SharePoint content.
Run the Sharing Report
- Click for Instructions for running the Sharing Report in OneDrive
- From the Microsoft 365 app launcher, select the OneDrive tile (Figure 1):
Figure 1: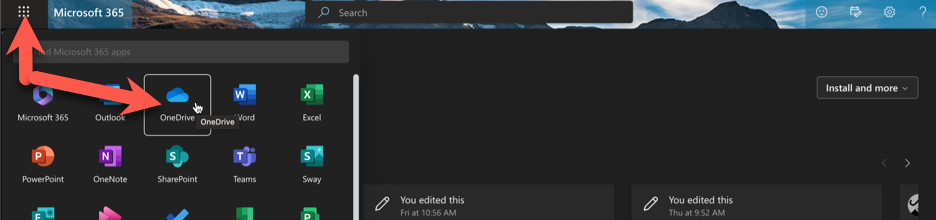
- Click the gear icon to open the Settings menu, then select OneDrive settings (Figure 2):
Figure 2: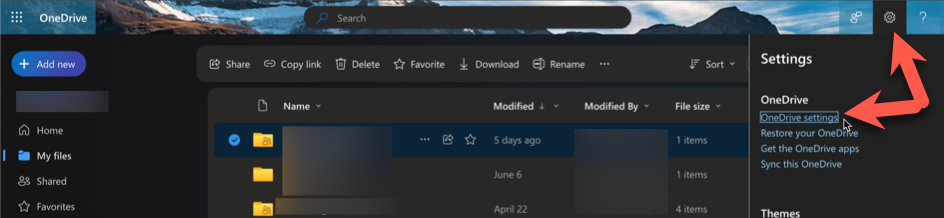
- Click More settings, and then select Run sharing report (Figure 3):
Figure 3: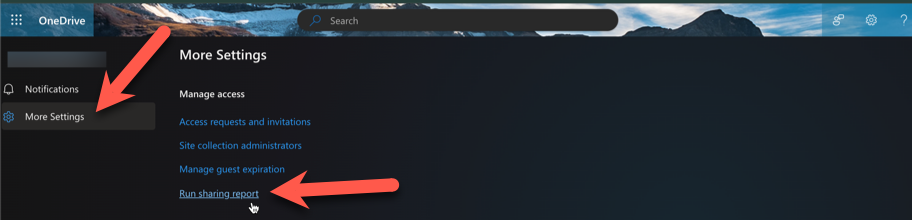
- Choose a location to save the report, and then click Save (Figure 4):
Figure 4: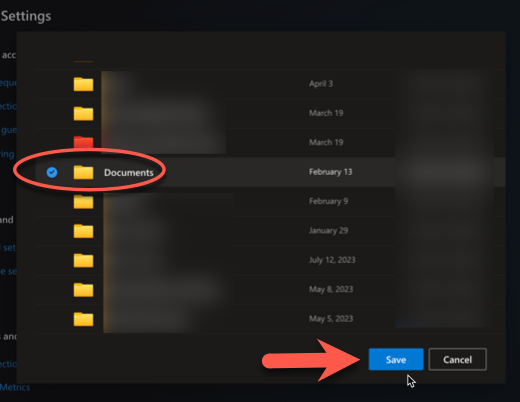
- The report may take some time to run depending on the size of the site. When the report is finished running you'll receive an email with a link to the report (Figure 5). You may also navigate to the saved location to locate the report (Figures 6):
Figure 5: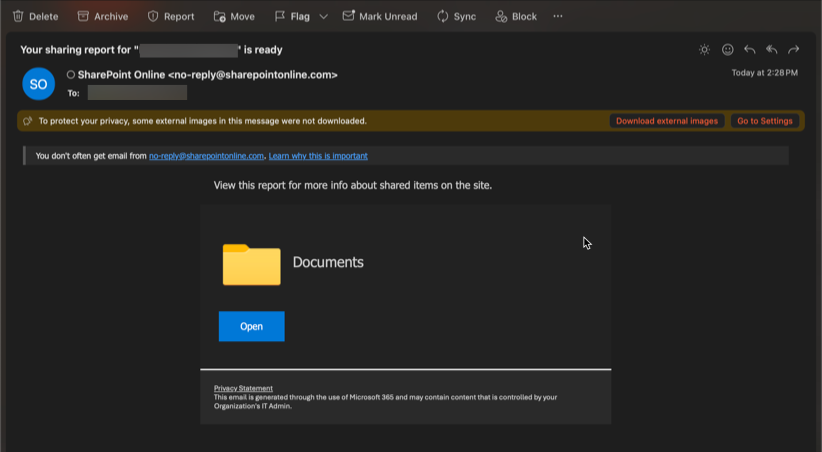
Figure 6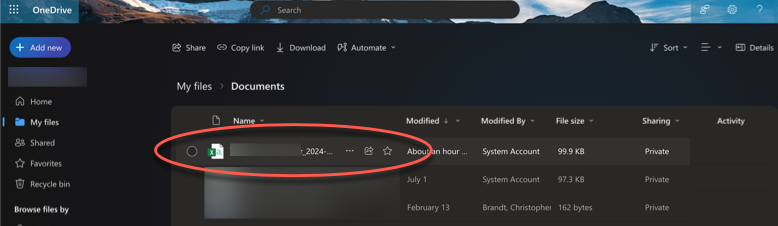
- Click for instructions for running the Sharing Report in SharePoint
- From the Microsoft 365 app launcher, select the SharePoint tile and then select the SharePoint site for which you would like to run the sharing report.
- From the SharePoint site page, click on the gear icon at the upper-right of the page to open the Settings menu, then select Site usage (Figure 1):
Figure 1: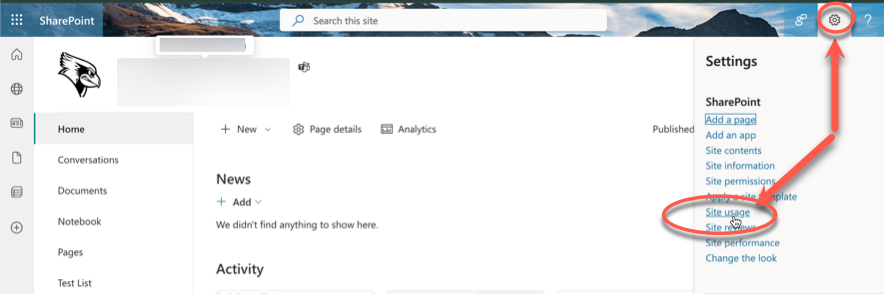
- Scroll down to the Shared with external users section, click Run report (Figure 2):
Figure 2: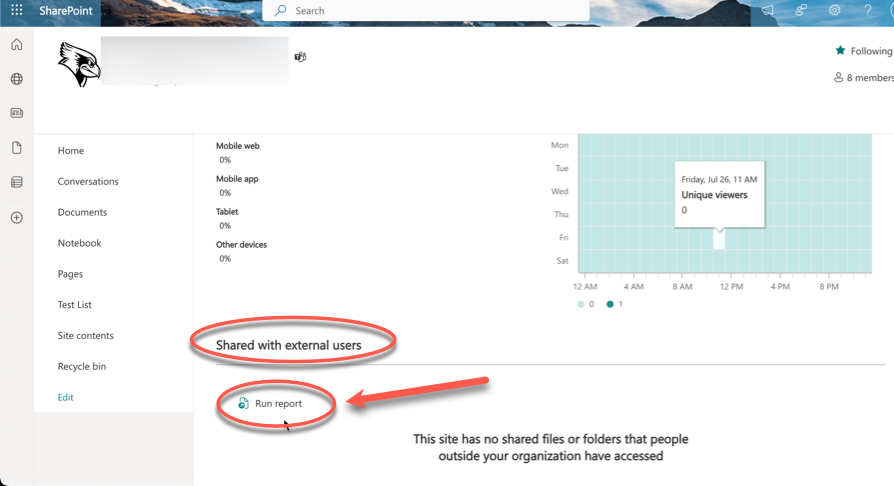
- Choose a location to save the report, and then click Save.
Format and Read the Sharing Report
Once you have generated your OneDrive Sharing report, following the directions above, you may view it to see the sharing settings for any OneDrive resource you have currently shared with others. There are several steps you will want to take in order to be able to better understand the report:
- Update the file format: You will be unable to make any edits to the report until you have converted the report format from .csv to .xlsx
- Insert a table: Inserting the report data into a table format will facilitate the ability to filter for relevant data
- Filter for relevant data: Filter your report for the most important data that will help you understand your current OneDrive sharing settings
These steps are described in detail below:
Update the File Format
When you initially open the Sharing report, you will not be able to make any changes to the file unless you first update the file format from .CSV to .XLSX. In order to do so, follow the appropriate instructions below:
- Click for instructions for the Excel Web App
- Open the Sharing report in Excel online.
- In the upper-right of the page, elect Viewing > Editing (Figure 1):
Figure 1: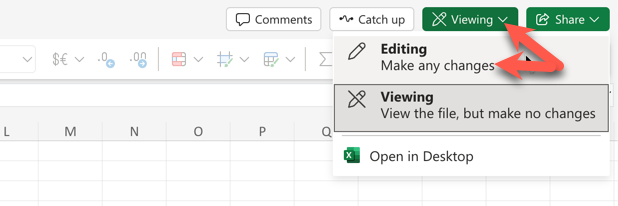
- In the File Conversion pop-up pane, select Convert (Figure 2):
Figure 2: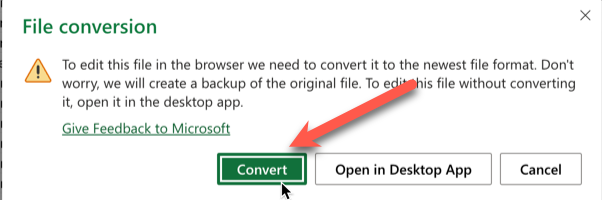
You have now converted your report into .xlsx format.
- Click for instructions for the Excel Desktop App
- Open the Sharing report in the Excel desktop app.
- Select File > Save As.
- Select a location to which to save the reformatted file, then click the drop-down arrow next to the File Format field and select Excel Workbook (.xlsx) (Figure 1):
Figure 1: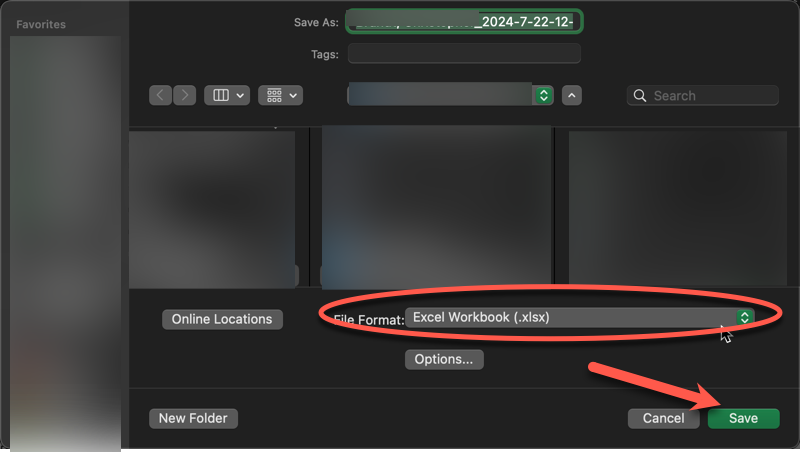
Your new file is in the .xlsx format. It is recommended you delete the original .csv file in order to avoid any confusion.
Format the Report Data into a Table
It is recommended you format the Sharing report data to display in a table to allow you to filter for specific data more easily.
- Click for instructions to insert a table
- With the report open in Excel, click on Edit > Select All to select all data in your table.
- Select the Insert tab and click Table (Figure 1). Make sure to select the box that states My Table Has Headers and then click OK (Figure 2):
Figure 1: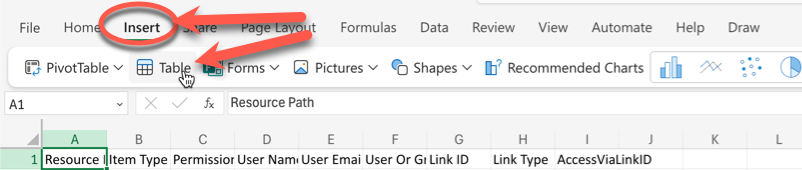
Figure 2: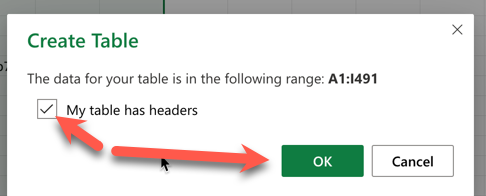
Now your report will dispay in a table format.
Use Filters to Identify Items Shared via Link or to Everyone Except External Users
You may filter your table data to display only those file/folder resources you have previously shared via a link or set to be shared with all users within the organization. This is useful in helping to determine which of your resources are widely shared so you may evaluate if such permission settings remain appropriate for that resource(s).
- Click for filtering instructions
- In your Sharing report (must already be formatted as a table, as described in the section above), click the filter button next to the column titled User Name.
- Then under Filter, select next to Everyone except external users and SharingLink and click Apply Filter (Figure 1):
Figure 1: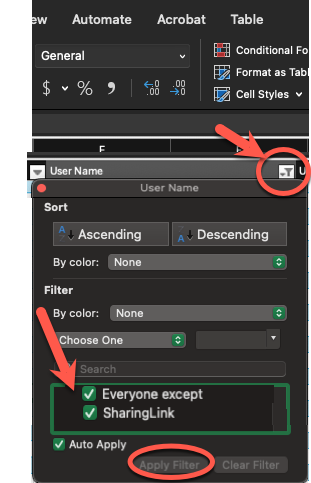
You will now only see those Sharing Report items where the user name equals one of those two selected. These will be the items you have shared either via link, or have set to be shared with all users within the ISU organization.
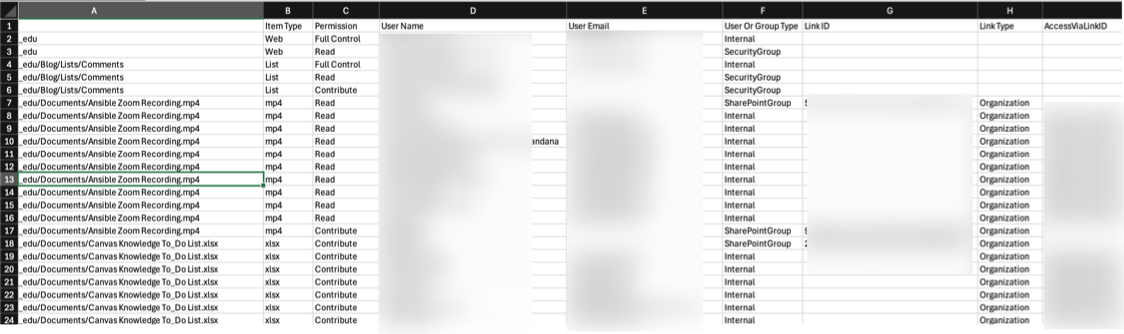
Report Key:
Note: Items shared with more than one individual or group will have multiple, adjacent rows in the report; one row for each named individual or group with access. Any item with only one row for which your own user ID/email address is listed has not been shared with anyone else.
- Resource Path:
- Path of the shared resource, with the name of the resource at the end of the path.
- Item Type:
- Specifies the file type of the shared resource.
- Permission:
- Specifies the level of permission granted to those with whom you have shared access:
- Full Control: Those you share the resource with may both view and edit access to the resource, as well as download the resource.
- Read: Those you share the resource with may view, but may not edit, the resource.
- Contribute: Those you share the resource with may both view and edit access to the resource.
- Specifies the level of permission granted to those with whom you have shared access:
- User Name: Friendly name of the user or group that has access to this item. If this is a sharing link, the user name is SharingLink.
- User Email: The email address of the user who has access to this item. This is blank for SharePoint groups.
- User or Group Type: The type of user or group: Member (internal), Guest (external), SharePoint group, Security group or Microsoft 365 group. (Note that Member refers to a member in the organization directory, not a member of the site.)
- Link ID: The GUID of the sharing link if user name is Sharing Link.
- Link Type: The type of link (Anonymous, Organization, Specific People) if user name is Sharing Link.
- Access ViaLinkID: The Link ID used to access the item if a user's permission to an item is via a link.
How to Get Help
Technical assistance is available through the Illinois State University Technology Support Center at:
- Phone: (309) 438-4357
- Email: SupportCenter@IllinoisState.edu
- Submit a Request via Web Form: Help.IllinoisState.edu/get-it-help
- Live Chat: Help.IllinoisState.edu/get-it-help